Oven-Baked Chicken Parm Thighs That Turn Out Perfectly Crispy – Easy, Flavorful, and Weeknight-Friendly
These chicken Parm thighs hit that sweet spot: big Italian-style flavor, golden crunch, and a melty cheese finish—all without frying. You’ll use bone-in, skin-on thighs for maximum juiciness and a baked breadcrumb crust that turns shatteringly crisp. It’s the kind of meal that feels special but doesn’t ask much from you.
Pair it with a simple salad, garlic bread, or spaghetti and you’ve got dinner locked in.

Oven-Baked Chicken Parm Thighs That Turn Out Perfectly Crispy - Easy, Flavorful, and Weeknight-Friendly
Ingredients
- Chicken: 6 bone-in, skin-on chicken thighs (about 2 to 2.5 pounds total)
- Olive oil: For drizzling and crust moisture
- Salt and black pepper: Kosher salt preferred
- Garlic powder and onion powder
- Dried Italian seasoning (or a mix of dried oregano and basil)
- Crushed red pepper flakes (optional, for heat)
- Panko breadcrumbs: For extra crunch
- Finely grated Parmesan cheese: Freshly grated if possible
- Eggs: 2 large, for dredging
- All-purpose flour: For first coat
- Marinara sauce: About 1 to 1.5 cups, thick style works best
- Shredded mozzarella: 1 to 1.5 cups, low-moisture preferred
- Fresh basil or parsley: For garnish (optional)
- Lemon wedges: Optional, for serving
Instructions
- Preheat and set up: Heat oven to 425°F (220°C). Line a rimmed baking sheet with foil for easy cleanup and set a wire rack on top. Lightly oil the rack.
- Season the chicken: Pat thighs dry with paper towels. Season all over with 1.5 teaspoons kosher salt, 1 teaspoon black pepper, 1 teaspoon garlic powder, 1 teaspoon onion powder, and 1 teaspoon Italian seasoning. Drizzle or brush with 1 tablespoon olive oil.
- Render and crisp the skin: Place thighs skin-side up on the rack. Bake 20 minutes to start rendering fat and firming the skin. This step helps prevent a soggy crust later.
- Mix the crumb coating: In a shallow bowl, combine 1.5 cups panko, 3/4 cup finely grated Parmesan, 1 teaspoon Italian seasoning, and a pinch of red pepper flakes if you like heat. Drizzle in 2 tablespoons olive oil and toss until evenly moistened. The oil helps browning.
- Set up a dredging station: Place 1/2 cup flour in one shallow bowl. Beat 2 eggs with a splash of water in a second bowl. Keep the breadcrumb mixture in a third.
- Coat the thighs: Remove chicken from the oven after 20 minutes. Let cool 3–5 minutes until safe to handle. Working one thigh at a time, press the skin gently so it adheres, then dredge in flour (shake off excess), dip in egg, and press into the panko–Parmesan mix, coating all sides. Return to the rack skin-side up.
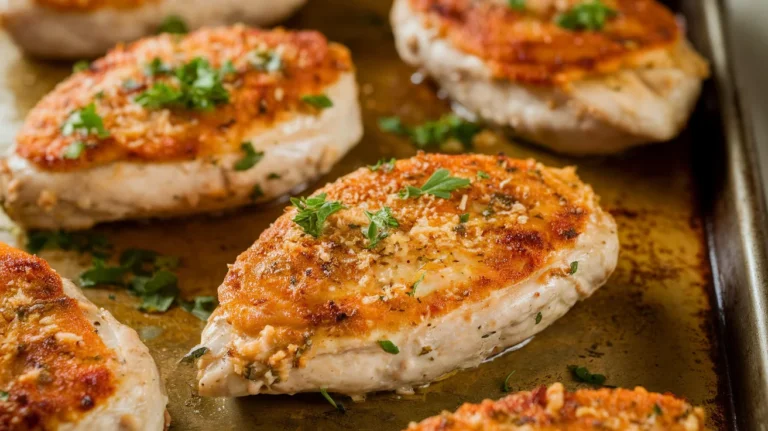
- Bake to golden and crisp: Return to the oven and bake 18–25 minutes more, until the crust is deep golden and the thickest part reads at least 175°F (80°C) for tender thighs. Dark meat benefits from going a little higher than 165°F; it gets more succulent.
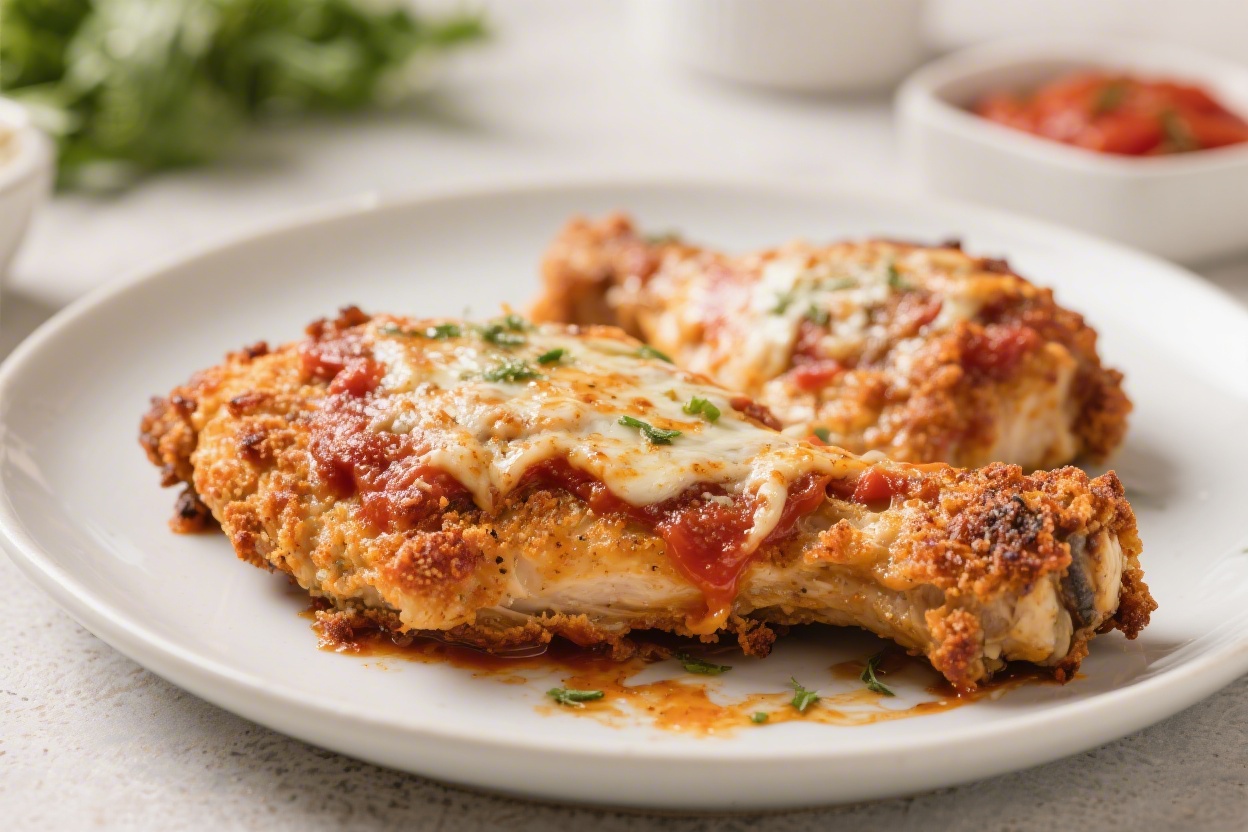
- Add Parm vibes, not sog: Spoon 1–2 tablespoons marinara onto the top of each thigh—just enough to flavor without swamping the crust. Sprinkle with mozzarella and a little extra Parmesan.
- Melt and finish: Bake 3–5 minutes more until cheese melts and starts to brown. If you want extra color, broil on high 1–2 minutes, watching closely.
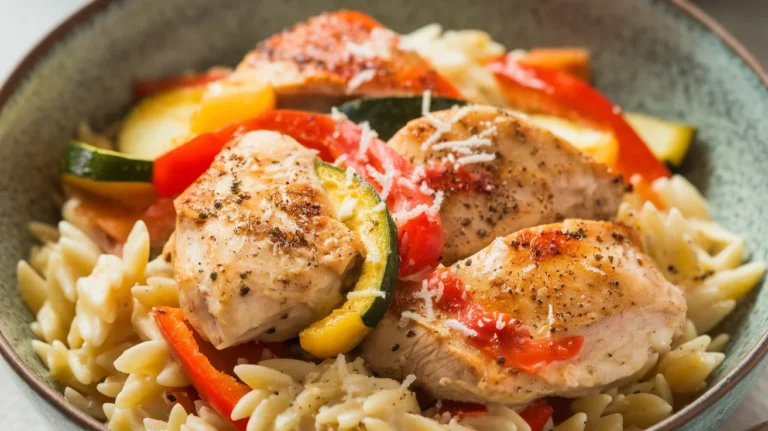
- Rest and serve: Let sit 5 minutes. Garnish with torn basil or chopped parsley. Serve with spaghetti, a side salad, roasted veggies, or garlic bread. A squeeze of lemon brightens everything.
What Makes This Special
This version leans on a few smart moves to keep everything crisp and flavorful. Bone-in thighs stay moist, while the skin provides natural insulation and crunch. A quick pre-bake renders the fat, so the crust doesn’t get soggy.
Using a wire rack lets hot air circulate, which means even browning without flipping. And finishing with a little marinara and cheese gives you that classic chicken Parm vibe without drowning the crust.
- Crisp without frying: The oven does the work, no oil splatter or standing over a skillet.
- Juicy every time: Thighs are forgiving, even if you cook them a few minutes longer.
- Texture you can hear: A panko–Parmesan crust bakes up extra crunchy.
- Simple pantry-friendly: No fancy steps—just season, bake, coat, and finish.
Shopping List
- Chicken: 6 bone-in, skin-on chicken thighs (about 2 to 2.5 pounds total)
- Olive oil: For drizzling and crust moisture
- Salt and black pepper: Kosher salt preferred
- Garlic powder and onion powder
- Dried Italian seasoning (or a mix of dried oregano and basil)
- Crushed red pepper flakes (optional, for heat)
- Panko breadcrumbs: For extra crunch
- Finely grated Parmesan cheese: Freshly grated if possible
- Eggs: 2 large, for dredging
- All-purpose flour: For first coat
- Marinara sauce: About 1 to 1.5 cups, thick style works best
- Shredded mozzarella: 1 to 1.5 cups, low-moisture preferred
- Fresh basil or parsley: For garnish (optional)
- Lemon wedges: Optional, for serving
Step-by-Step Instructions
- Preheat and set up: Heat oven to 425°F (220°C). Line a rimmed baking sheet with foil for easy cleanup and set a wire rack on top.Lightly oil the rack.
- Season the chicken: Pat thighs dry with paper towels. Season all over with 1.5 teaspoons kosher salt, 1 teaspoon black pepper, 1 teaspoon garlic powder, 1 teaspoon onion powder, and 1 teaspoon Italian seasoning. Drizzle or brush with 1 tablespoon olive oil.
- Render and crisp the skin: Place thighs skin-side up on the rack.Bake 20 minutes to start rendering fat and firming the skin. This step helps prevent a soggy crust later.
- Mix the crumb coating: In a shallow bowl, combine 1.5 cups panko, 3/4 cup finely grated Parmesan, 1 teaspoon Italian seasoning, and a pinch of red pepper flakes if you like heat. Drizzle in 2 tablespoons olive oil and toss until evenly moistened.The oil helps browning.
- Set up a dredging station: Place 1/2 cup flour in one shallow bowl. Beat 2 eggs with a splash of water in a second bowl. Keep the breadcrumb mixture in a third.
- Coat the thighs: Remove chicken from the oven after 20 minutes.Let cool 3–5 minutes until safe to handle. Working one thigh at a time, press the skin gently so it adheres, then dredge in flour (shake off excess), dip in egg, and press into the panko–Parmesan mix, coating all sides. Return to the rack skin-side up.
- Bake to golden and crisp: Return to the oven and bake 18–25 minutes more, until the crust is deep golden and the thickest part reads at least 175°F (80°C) for tender thighs.Dark meat benefits from going a little higher than 165°F; it gets more succulent.
- Add Parm vibes, not sog: Spoon 1–2 tablespoons marinara onto the top of each thigh—just enough to flavor without swamping the crust. Sprinkle with mozzarella and a little extra Parmesan.
- Melt and finish: Bake 3–5 minutes more until cheese melts and starts to brown. If you want extra color, broil on high 1–2 minutes, watching closely.
- Rest and serve: Let sit 5 minutes.Garnish with torn basil or chopped parsley. Serve with spaghetti, a side salad, roasted veggies, or garlic bread. A squeeze of lemon brightens everything.
Storage Instructions
- Refrigerate: Cool completely.Store in an airtight container up to 4 days.
- Reheat for crispness: Use a 375°F (190°C) oven or toaster oven for 12–15 minutes, or air fryer at 360°F (182°C) for 6–8 minutes. Avoid microwaving if you want to keep the crust crisp.
- Freeze: Freeze on a sheet pan until solid, then transfer to a freezer bag for up to 2 months. Reheat from frozen at 375°F until hot and crisp, about 20–25 minutes.
- Leftover ideas: Slice and layer into a toasted sub with extra warm marinara, or chop and toss with penne for a fast pasta dinner.
Benefits of This Recipe
- Lower mess, lower oil: All the crunch without a deep fryer or greasy stovetop.
- Consistently juicy: Chicken thighs are forgiving and flavorful.
- Meal prep–friendly: Reheats well and stays satisfying.
- Balanced flavor: Savory Parmesan, garlicky breadcrumbs, bright marinara, and melty mozzarella.
- Family-approved: Comforting and familiar, with an easy wow factor.
Common Mistakes to Avoid
- Skipping the rack: Without a rack, the bottoms steam and soften.If you don’t have one, flip halfway and drain any excess fat from the pan.
- Too much sauce: Heavy marinara makes the crust soggy. Use a thin layer on top only.
- Undersalting: Season the chicken before coating and season the breadcrumb mixture. Parmesan is salty, but you still need base seasoning.
- Not drying the chicken: Patting dry helps the first bake crisp the skin.
- Rushing the bake: Thighs shine when cooked to at least 175°F.Pulling at 165°F can leave them chewier.
Alternatives
- Skinless version: Use boneless, skinless thighs. Skip the pre-bake; start with dredge and bake 18–22 minutes total. Expect slightly less crunch but still great flavor.
- Gluten-free: Use a 1:1 gluten-free flour blend and gluten-free panko.Check your marinara label.
- Dairy-free: Swap Parmesan for nutritional yeast in the crumb and use a dairy-free mozzarella. Flavor stays bold.
- Spicy arrabbiata: Use spicy marinara and add extra red pepper flakes to the crumbs.
- Herb-forward: Add lemon zest and chopped fresh parsley to the breadcrumb mix for a brighter profile.
- Air fryer: Cook at 360°F (182°C). After seasoning, air fry 12 minutes skin-side up, coat with crumb, then air fry 10–12 minutes more.Add sauce and cheese, then 2–3 minutes until melted.
FAQ
Can I use chicken breasts instead of thighs?
Yes. Use boneless, skinless breasts pounded to an even 3/4-inch thickness. Skip the pre-bake step.
Dredge and bake at 425°F for 15–20 minutes, depending on size, then add sauce and cheese and bake 3–5 minutes more. Keep an eye on internal temp so they don’t dry out.
How do I prevent the breadcrumb coating from falling off?
Pat the chicken dry and press the skin so it adheres before dredging. Shake off excess flour, fully coat in egg, and firmly press into the crumb.
Let the coated thighs rest 5 minutes before baking to help the crust set.
What marinara works best?
Use a thicker sauce so it sits on top without sliding off. A robust, garlicky marinara or arrabbiata is great. If your sauce is thin, simmer it for a few minutes to reduce before adding.
Do I need to flip the chicken while baking?
No, not if you’re using a rack.
Air flow crisps both sides. If baking directly on a sheet, flip once halfway to avoid soggy bottoms.
Can I prepare this ahead?
You can pre-bake the thighs for the first 20 minutes, cool, and refrigerate up to a day. When ready, dredge, crumb, and finish baking.
This trick makes weeknight cooking faster and keeps the crust fresh.
What if I don’t have panko?
Use regular breadcrumbs mixed with a tablespoon of olive oil, but expect a slightly finer crust. Crushed cornflakes or crushed plain chips also work for a fun twist.
How do I know when the thighs are done?
Use an instant-read thermometer. Aim for at least 175°F in the thickest part, not touching bone.
The juices should run clear, and the crust should be deep golden.
Is there a good side dish pairing?
Classic spaghetti with extra marinara is perfect. Or try a peppery arugula salad with lemon vinaigrette, roasted broccoli, or buttery garlic bread to keep things simple.
Can I reduce the cheese?
Absolutely. Use just Parmesan in the crumbs and skip the mozzarella topping, or sprinkle lightly.
You’ll still get that savory Parm flavor and crisp finish.
Why bake at 425°F?
The higher heat renders fat quickly and browns the crust without drying the meat. It’s the sweet spot for crispness and juiciness.
Wrapping Up
These oven-baked chicken Parm thighs deliver everything you love about the classic without the hassle of frying. The crust stays crunchy, the meat stays juicy, and the cheesy marinara on top seals the deal.
Keep this method in your back pocket for easy weeknights, casual guests, or anytime you want comfort food that tastes like more work than it was. Simple, reliable, and flat-out delicious.
Printable Recipe Card
Want just the essential recipe details without scrolling through the article? Get our printable recipe card with just the ingredients and instructions.